Measuring temperature and humidity for a personal weather station or within your house can be done easily with the DHT11. A commonly available and cheap sensor.
The Hardware
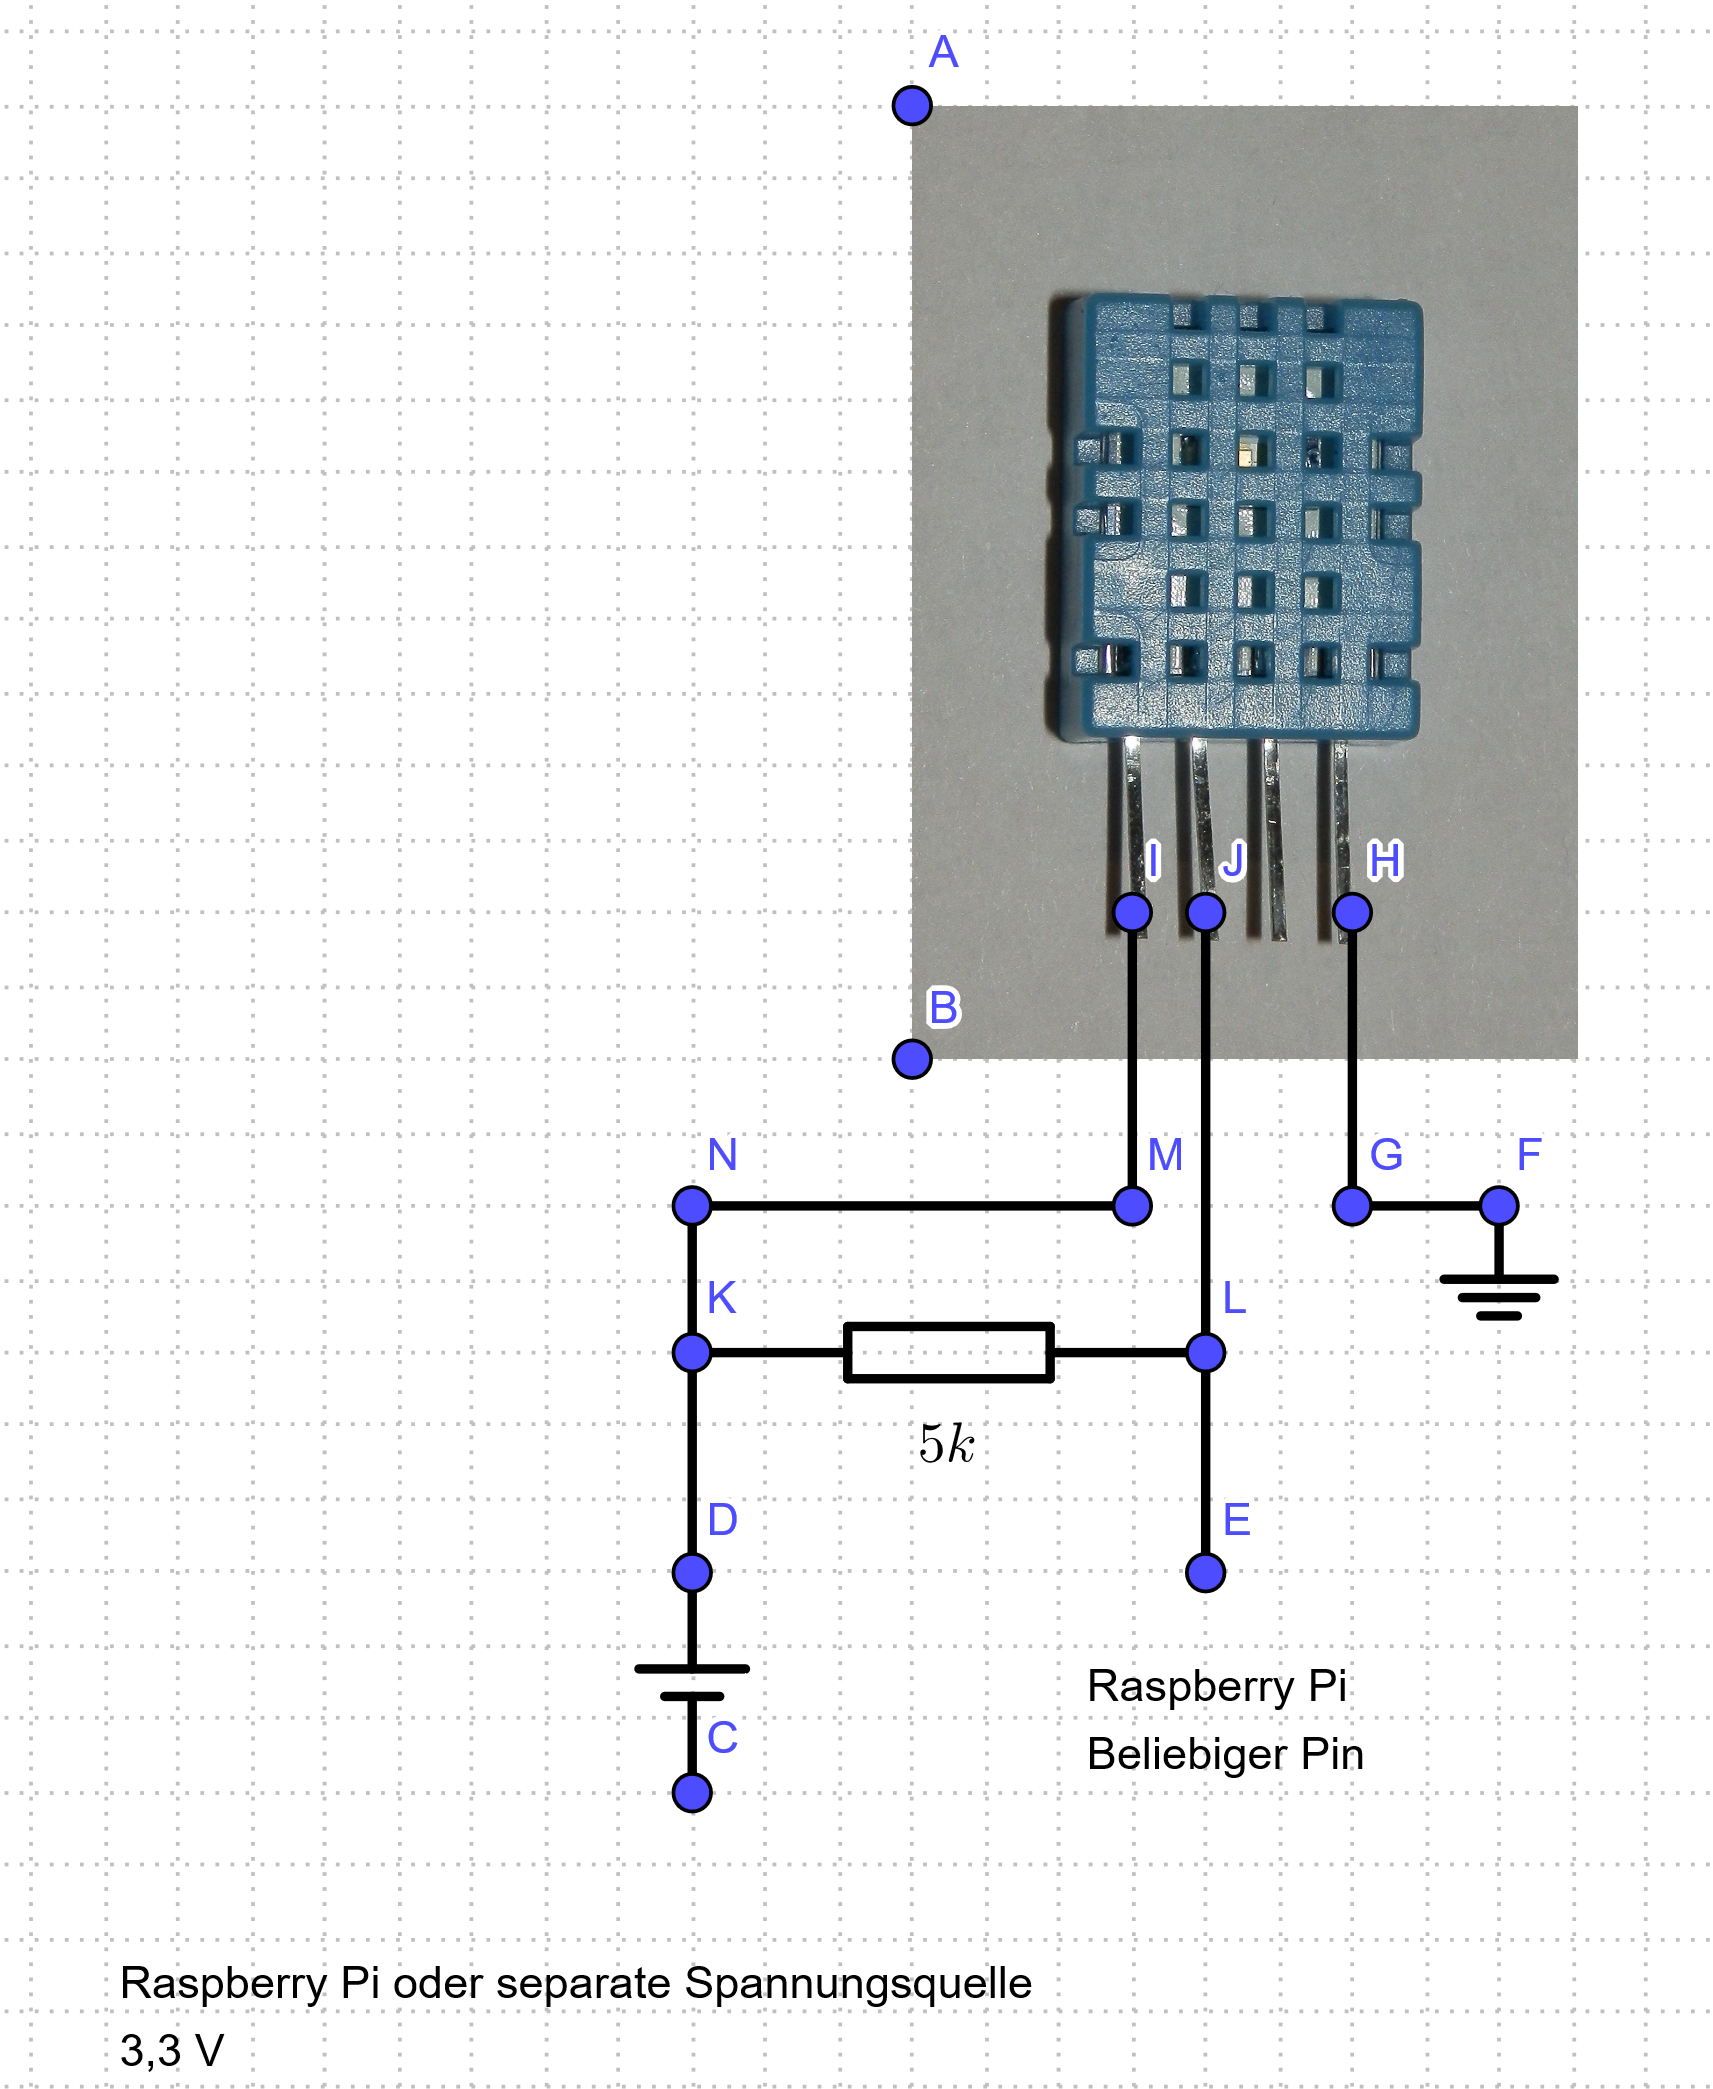
The sensor requires only a minimum of hardware and soldering.

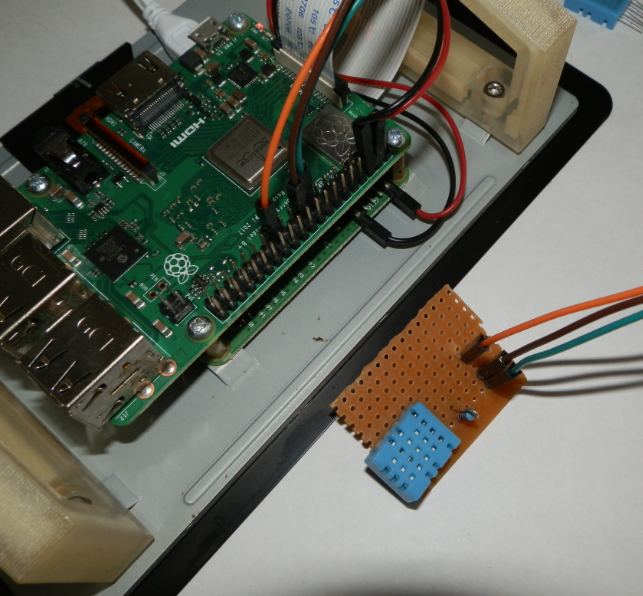
This simple circuit can be built on a bread board or a strip board. You may also just purchase a premade solution which includes the resistor. The power source can be any 3.3 V source. I am using the dedicated power pins of the Raspberry Pi. Which input pin you choose is up to you.

Prepare the Software
You have to install some librarys to speak with the sensor. The whole communication protocol of the sensor is too fast to be dealt with in Python. Therefore do you have to implement some C librarys.
git clone https://github.com/adafruit/Adafruit_Python_DHT.git && cd Adafruit_Python_DHT
sudo python3 setup.py install
There is already a little test script included in the install. You can use it now to see if the install was successfull. Open a terminal and go to the examples directory and run the script. Just make sure to use the correct sensor type and pin. The 11 represents the DHT 11 and the 10 the pin where the sensor is connected. Change it to whatever pin you are using.
cd examples
sudo ./AdafruitDHT.py 11 10
The result is a simple text output and should look like this:
Implementation in a Pyhton script
The script below shows you how to use the library to get the temperature and humidity value from your own Pyhton program.
# encoding: utf-8
#Adafruit Library to communicate with the sensor
import Adafruit_DHT

#set-up the sensor and acquire values for temperature and humidity
sensor = Adafruit_DHT.DHT11
pin = 10

#acquire readings for temperature and humidity
humidity, temperature = Adafruit_DHT.read_retry(sensor, pin)

#print values
print('Temperatur {} °C\nrel. Feuchte {} %rH'.format(temperature, humidity))
