")
")

The cumbersome way of layouting and object binding in the pyton file of your project is now replaced with a stringent and logical new approach. The KV desing language. The task of creating your apps layout and then programming the functionality behind it is now separated into the kv file and a python file which follows the doctrine of the separation of concern.
Introduction
The KV language will help you to deal with complex and big projects. You can easily create widget trees and layouts and change them equally fast. Bindings and sizing are also done in the KV languagel easily without having to work on the pyhton code. Our project is going to download and display good old Chuck Norris jokes from https://api.chucknorris.io/.

To start with just name your KV file the same as your python file. Just remove the App and write it all in lower case. Kivy will automatically load your KV file whih is named according to this convention. You can also load it using the Builder function but we start off with the standard functionality for the time being.
The KV file needs a root widget. It is declared by a name and a : at the end. For our app that is the
ChuckNorrisJokes:You can now refer to any function defined in the pyhton class ChuckNorrisJokes by using the key word root.
From now on we will simply add Buttons and Labels under the root widget and take care of sizes etc. directly in the KV file.
The Code
The KV file starts with defining a root widget. ChuckNorrisJokes.
Under the root widget, we add the label which is going to show the jokes and two buttons. One shall download a new joke and the reset button shall clear the label.
The binding to objects and functions is rather simple. The labels text attribute is bound to the joke variable of the root widget.
In a similar way are we binding the on_press event of each button to the respective functions of the root widget.
ChuckNorrisJokes:
    Label:
        text: root.joke
        text_size: self.width, None
        halign: 'center'
    Button:
        text: 'Download new Joke'
        pos_hint: {'bottom': 1, 'left': 1}
        size_hint: 0.5, 0.2
        on_press: root.get_new_joke()
    Button:
        text: 'Reset'
        pos_hint: {'bottom': 1, 'right': 1}
        size_hint: 0.5, 0.2
        on_press: root.reset_joke()
The pyhton file is also a lot smaller now compared to our previous projects since a lot of troublesome declarations is outsourced to the KV file.
To make the binidng of the joke variable work are we going to make it a StringProperty.
To download the jokes are we going to use the asynchronous UrlRequest function of Kivy which provides a non-blocking way of getting data from the internet.
from kivy.app import App
from kivy.uix.floatlayout import FloatLayout
from kivy.properties import StringProperty
from kivy.network.urlrequest import UrlRequest

class ChuckNorrisJokes(FloatLayout):
    joke = StringProperty('')

    def get_new_joke(self):
        request = UrlRequest(url = 'https://api.chucknorris.io/jokes/random', on_success=self.update_joke, on_error=self.show_error)

    def update_joke(self, request, result):
        self.joke = result['value']

    def show_error(self, request, error):
        print(error)

    def reset_joke(self):
        self.joke = ''

class ChuckNorrisJokesApp(App):
    pass

if __name__ == '__main__':
    ChuckNorrisJokesApp().run()
Some details to the functions.
get_new_joke
When our user presses the button the function starts the UrlRequest.
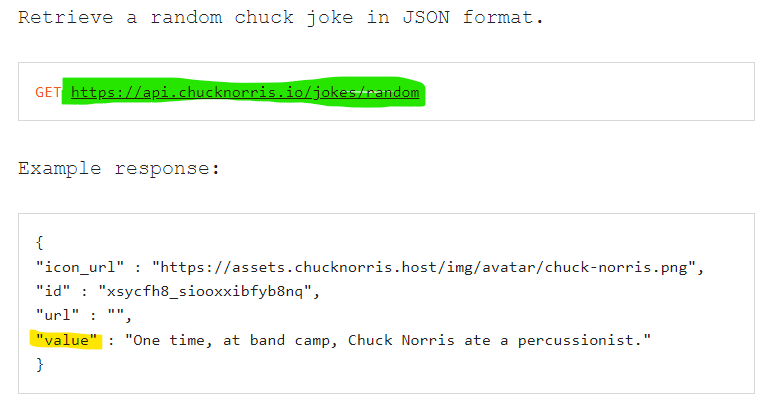
- url is as defined by https://api.chucknorris.io/
- on_success calls the function update_joke in case of a successfull request. The call is going to pass the arguments request and result. In our case is the result a json varialbe which is automatically parsed by the UrlRequest and we don't have to do anything else. The variable is then written to the joke variable. As soon as this is done is the text of the label showing our joke.
- on_error is called if the request fails. Maybe because of a bad request or a broken connection. It also passes the request and the error which we print fro debugging purposes
What's Next
Next time we'll make our buttons look a bit more modern and learn how to re-use self-made widgets easily